这种东西用Docker搭建有点麻烦,但搭建好之后只能用一个字形容:“好用”!
Penpot是一个强大且免费的在线设计和原型工具,专为团队协作而构建。它允许设计师、开发者和产品经理在同一平台上无缝地创建、分享和迭代设计项目。基于 Web 的 PenPot 能够在任何操作系统上运行,并提供丰富的功能,帮助您提高工作效率并简化工作流程。
Penpot 使用现代化的技术栈构建,包括Web 技术、Puppeteer、Node.js、MongoDB、GraphQL API,内置矢量绘图工具,支持形状、文本、图像操作,以及自定义颜色和样式,创建交互式原型,设置页面间跳转,预览并分享给团队或客户。
本例中,我们在Linux系统使用Docker快速进行本地部署。

下载docker-compose文件
sudo curl -L "https://github.com/docker/compose/releases/download/1.29.2/docker-compose-$(uname -s)-$(uname -m)" -o /usr/local/bin/docker-compose给他一个执行权限
sudo chmod +x /usr/local/bin/docker-compose查看是否安装成功
docker-compose -versionDocker镜像源添加方法
如因网络问题拉取不到镜像,
可尝试在终端执行
sudo nano /etc/docker/daemon.json输入:
{
"registry-mirrors": [
"https://do.nark.eu.org",
"https://dc.j8.work",
"https://docker.m.daocloud.io",
"https://dockerproxy.com",
"https://docker.mirrors.ustc.edu.cn",
"https://docker.nju.edu.cn"
]
}
保存退出
然后执行:
sudo systemctl restart docker创建并启动Penpot容器
成功拉取 Piwigo 镜像后,我们在Home目录下的docker路径新增该项目目录
cd /etc/docker
/etc/docker# sudo mkdir penpot然后在该项目中创建docker-compose.yml
sudo nano docker-compose.yml输入下方代码并保存退出:
version: "3.8"

networks:
  penpot:

volumes:
  penpot_postgres_v15:
  penpot_assets:
  # penpot_traefik:
  # penpot_minio:

services:
  ## Traefik service declaration example. Consider using it if you are going to expose
  ## penpot to the internet or different host than `localhost`.

  # traefik:
  #   image: traefik:v2.9
  #   networks:
  #     - penpot
  #   command:
  #     - "--api.insecure=true"
  #     - "--entryPoints.web.address=:80"
  #     - "--providers.docker=true"
  #     - "--providers.docker.exposedbydefault=false"
  #     - "--entryPoints.websecure.address=:443"
  #     - "--certificatesresolvers.letsencrypt.acme.tlschallenge=true"
  #     - "--certificatesresolvers.letsencrypt.acme.email=<EMAIL_ADDRESS>"
  #     - "--certificatesresolvers.letsencrypt.acme.storage=/traefik/acme.json"
  #   volumes:
  #     - "penpot_traefik:/traefik"
  #     - "/var/run/docker.sock:/var/run/docker.sock"
  #   ports:
  #     - "80:80"
  #     - "443:443"

  penpot-frontend:
    image: "penpotapp/frontend:latest"
    restart: always
    ports:
      - 9001:80

    volumes:
      - penpot_assets:/opt/data/assets

    depends_on:
      - penpot-backend
      - penpot-exporter

    networks:
      - penpot

    labels:
      - "traefik.enable=true"

      ## HTTP: example of labels for the case if you are going to expose penpot to the
      ## internet using only HTTP (without HTTPS) with traefik

      # - "traefik.http.routers.penpot-http.entrypoints=web"
      # - "traefik.http.routers.penpot-http.rule=Host(`<DOMAIN_NAME>`)"
      # - "traefik.http.services.penpot-http.loadbalancer.server.port=80"

      ## HTTPS: example of labels for the case if you are going to expose penpot to the
      ## internet using with HTTPS using traefik

      # - "traefik.http.middlewares.http-redirect.redirectscheme.scheme=https"
      # - "traefik.http.middlewares.http-redirect.redirectscheme.permanent=true"
      # - "traefik.http.routers.penpot-http.entrypoints=web"
      # - "traefik.http.routers.penpot-http.rule=Host(`<DOMAIN_NAME>`)"
      # - "traefik.http.routers.penpot-http.middlewares=http-redirect"
      # - "traefik.http.routers.penpot-https.entrypoints=websecure"
      # - "traefik.http.routers.penpot-https.rule=Host(`<DOMAIN_NAME>`)"
      # - "traefik.http.services.penpot-https.loadbalancer.server.port=80"
      # - "traefik.http.routers.penpot-https.tls=true"
      # - "traefik.http.routers.penpot-https.tls.certresolver=letsencrypt"

    ## Configuration envronment variables for frontend the container. In this case this
    ## container only needs the `PENPOT_FLAGS`. This environment variable is shared with
    ## other services but not all flags are relevant to all services.

    environment:
      ## Relevant flags for frontend:
      ## - demo-users
      ## - login-with-github
      ## - login-with-gitlab
      ## - login-with-google
      ## - login-with-ldap
      ## - login-with-oidc
      ## - login-with-password
      ## - registration
      ## - webhooks
      ##
      ## You can read more about all available flags on:
      ## https://help.penpot.app/technical-guide/configuration/#advanced-configuration

      - PENPOT_FLAGS=enable-registration enable-login-with-password

  penpot-backend:
    image: "penpotapp/backend:latest"
    restart: always

    volumes:
      - penpot_assets:/opt/data/assets

    depends_on:
      - penpot-postgres
      - penpot-redis

    networks:
      - penpot

    ## Configuration envronment variables for backend the
    ## container.

    environment:

      ## Relevant flags for backend:
      ## - demo-users
      ## - email-verification
      ## - log-emails
      ## - log-invitation-tokens
      ## - login-with-github
      ## - login-with-gitlab
      ## - login-with-google
      ## - login-with-ldap
      ## - login-with-oidc
      ## - login-with-password
      ## - registration
      ## - secure-session-cookies
      ## - smtp
      ## - smtp-debug
      ## - telemetry
      ## - webhooks
      ## - prepl-server
      ##
      ## You can read more about all available flags and other
      ## environment variables for the backend here:
      ## https://help.penpot.app/technical-guide/configuration/#advanced-configuration

      - PENPOT_FLAGS=enable-registration enable-login-with-password disable-email-verification enable-smtp enable-prepl-server

      ## Penpot SECRET KEY. It serves as a master key from which other keys for subsystems
      ## (eg http sessions, or invitations) are derived.
      ##
      ## If you leve it commented, all created sessions and invitations will
      ## become invalid on container restart.
      ##
      ## If you going to uncomment this, we recommend use here a trully randomly generated
      ## 512 bits base64 encoded string.  You can generate one with:
      ##
      ## python3 -c "import secrets; print(secrets.token_urlsafe(64))"

      # - PENPOT_SECRET_KEY=my-insecure-key

      ## The PREPL host. Mainly used for external programatic access to penpot backend
      ## (example: admin). By default it listen on `localhost` but if you are going to use
      ## the `admin`, you will need to uncomment this and set the host to `0.0.0.0`.

      # - PENPOT_PREPL_HOST=0.0.0.0

      ## Public URI. If you are going to expose this instance to the internet and use it
      ## under different domain than 'localhost', you will need to adjust it to the final
      ## domain.
      ##
      ## Consider using traefik and set the 'disable-secure-session-cookies' if you are
      ## not going to serve penpot under HTTPS.

      - PENPOT_PUBLIC_URI=http://localhost:9001

      ## Database connection parameters. Don't touch them unless you are using custom
      ## postgresql connection parameters.

      - PENPOT_DATABASE_URI=postgresql://penpot-postgres/penpot
      - PENPOT_DATABASE_USERNAME=penpot
      - PENPOT_DATABASE_PASSWORD=penpot

      ## Redis is used for the websockets notifications. Don't touch unless the redis
      ## container has different parameters or different name.

      - PENPOT_REDIS_URI=redis://penpot-redis/0

      ## Default configuration for assets storage: using filesystem based with all files
      ## stored in a docker volume.

      - PENPOT_ASSETS_STORAGE_BACKEND=assets-fs
      - PENPOT_STORAGE_ASSETS_FS_DIRECTORY=/opt/data/assets

      ## Also can be configured to to use a S3 compatible storage
      ## service like MiniIO. Look below for minio service setup.

      # - AWS_ACCESS_KEY_ID=<KEY_ID>
      # - AWS_SECRET_ACCESS_KEY=<ACCESS_KEY>
      # - PENPOT_ASSETS_STORAGE_BACKEND=assets-s3
      # - PENPOT_STORAGE_ASSETS_S3_ENDPOINT=http://penpot-minio:9000
      # - PENPOT_STORAGE_ASSETS_S3_BUCKET=<BUKET_NAME>

      ## Telemetry. When enabled, a periodical process will send anonymous data about this
      ## instance. Telemetry data will enable us to learn on how the application is used,
      ## based on real scenarios. If you want to help us, please leave it enabled. You can
      ## audit what data we send with the code available on github

      - PENPOT_TELEMETRY_ENABLED=true

      ## Example SMTP/Email configuration. By default, emails are sent to the mailcatch
      ## service, but for production usage is recommended to setup a real SMTP
      ## provider. Emails are used to confirm user registrations & invitations. Look below
      ## how mailcatch service is configured.

      - PENPOT_SMTP_DEFAULT_FROM=no-reply@example.com
      - PENPOT_SMTP_DEFAULT_REPLY_TO=no-reply@example.com
      - PENPOT_SMTP_HOST=penpot-mailcatch
      - PENPOT_SMTP_PORT=1025
      - PENPOT_SMTP_USERNAME=
      - PENPOT_SMTP_PASSWORD=
      - PENPOT_SMTP_TLS=false
      - PENPOT_SMTP_SSL=false

  penpot-exporter:
    image: "penpotapp/exporter:latest"
    restart: always
    networks:
      - penpot

    environment:
      # Don't touch it; this uses internal docker network to
      # communicate with the frontend.
      - PENPOT_PUBLIC_URI=http://penpot-frontend

      ## Redis is used for the websockets notifications.
      - PENPOT_REDIS_URI=redis://penpot-redis/0

  penpot-postgres:
    image: "postgres:15"
    restart: always
    stop_signal: SIGINT

    volumes:
      - penpot_postgres_v15:/var/lib/postgresql/data

    networks:
      - penpot

    environment:
      - POSTGRES_INITDB_ARGS=--data-checksums
      - POSTGRES_DB=penpot
      - POSTGRES_USER=penpot
      - POSTGRES_PASSWORD=penpot

  penpot-redis:
    image: redis:7
    restart: always
    networks:
      - penpot

  ## A mailcatch service, used as temporal SMTP server. You can access via HTTP to the
  ## port 1080 for read all emails the penpot platform has sent. Should be only used as a
  ## temporal solution meanwhile you don't have a real SMTP provider configured.

  penpot-mailcatch:
    image: sj26/mailcatcher:latest
    restart: always
    expose:
      - '1025'
    ports:
      - "1080:1080"
    networks:
      - penpot

  ## Example configuration of MiniIO (S3 compatible object storage service); If you don't
  ## have preference, then just use filesystem, this is here just for the completeness.

  # minio:
  #   image: "minio/minio:latest"
  #   command: minio server /mnt/data --console-address ":9001"
  #   restart: always
  #
  #   volumes:
  #     - "penpot_minio:/mnt/data"
  #
  #   environment:
  #     - MINIO_ROOT_USER=minioadmin
  #     - MINIO_ROOT_PASSWORD=minioadmin
  #
  #   ports:
  #     - 9000:9000
  #     - 9001:9001
然后执行下方命令启动容器运行镜像:
sudo docker-compose up -d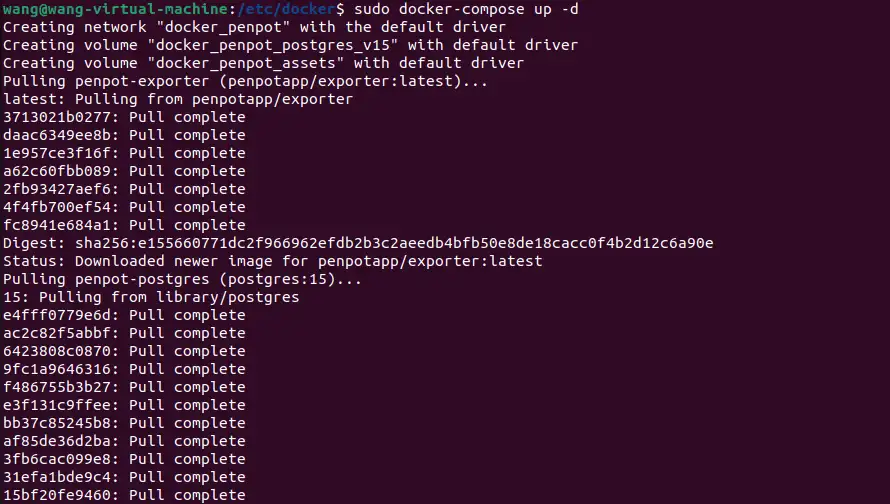
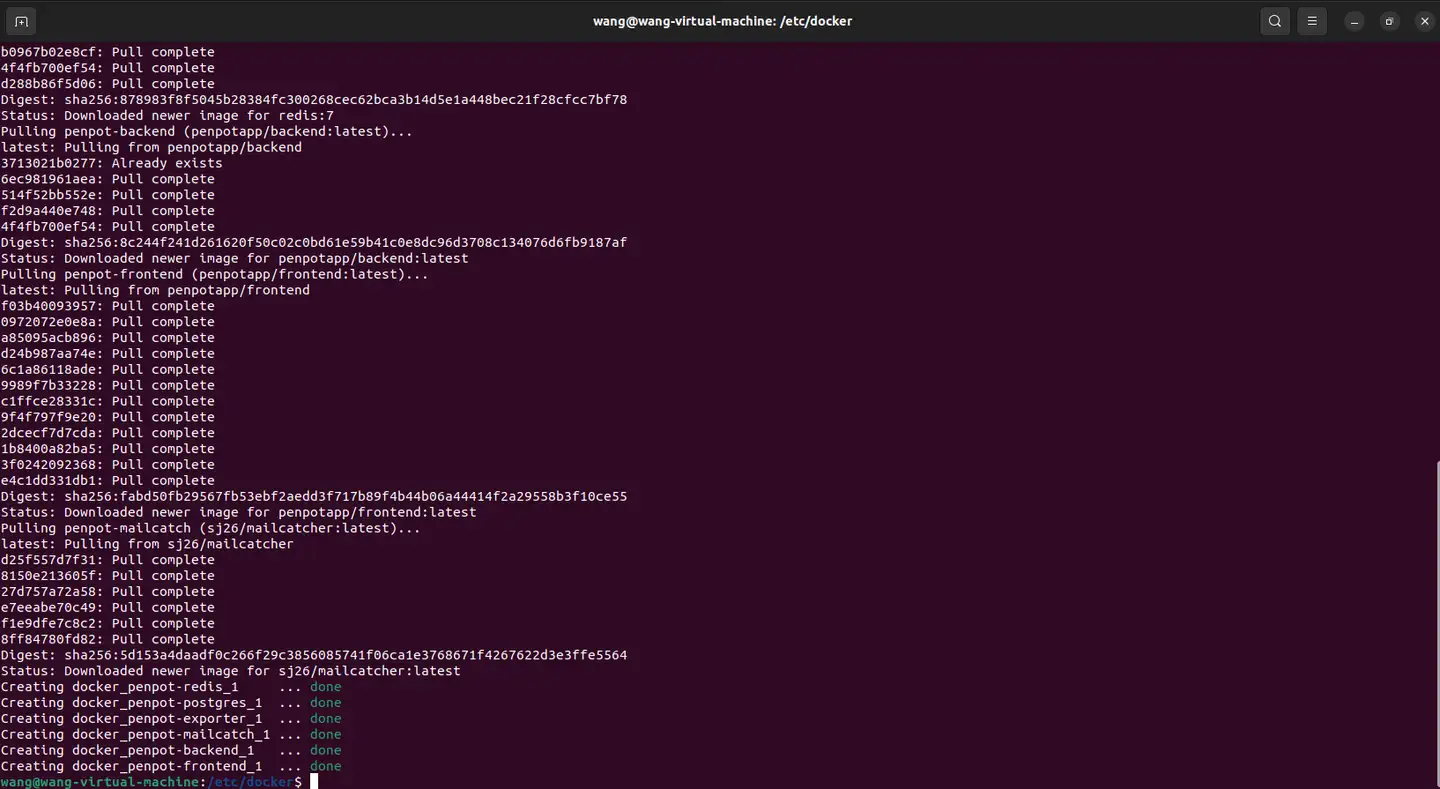
如需停止可以执行:
sudo docker-compose down本地使用Penpot进行创作
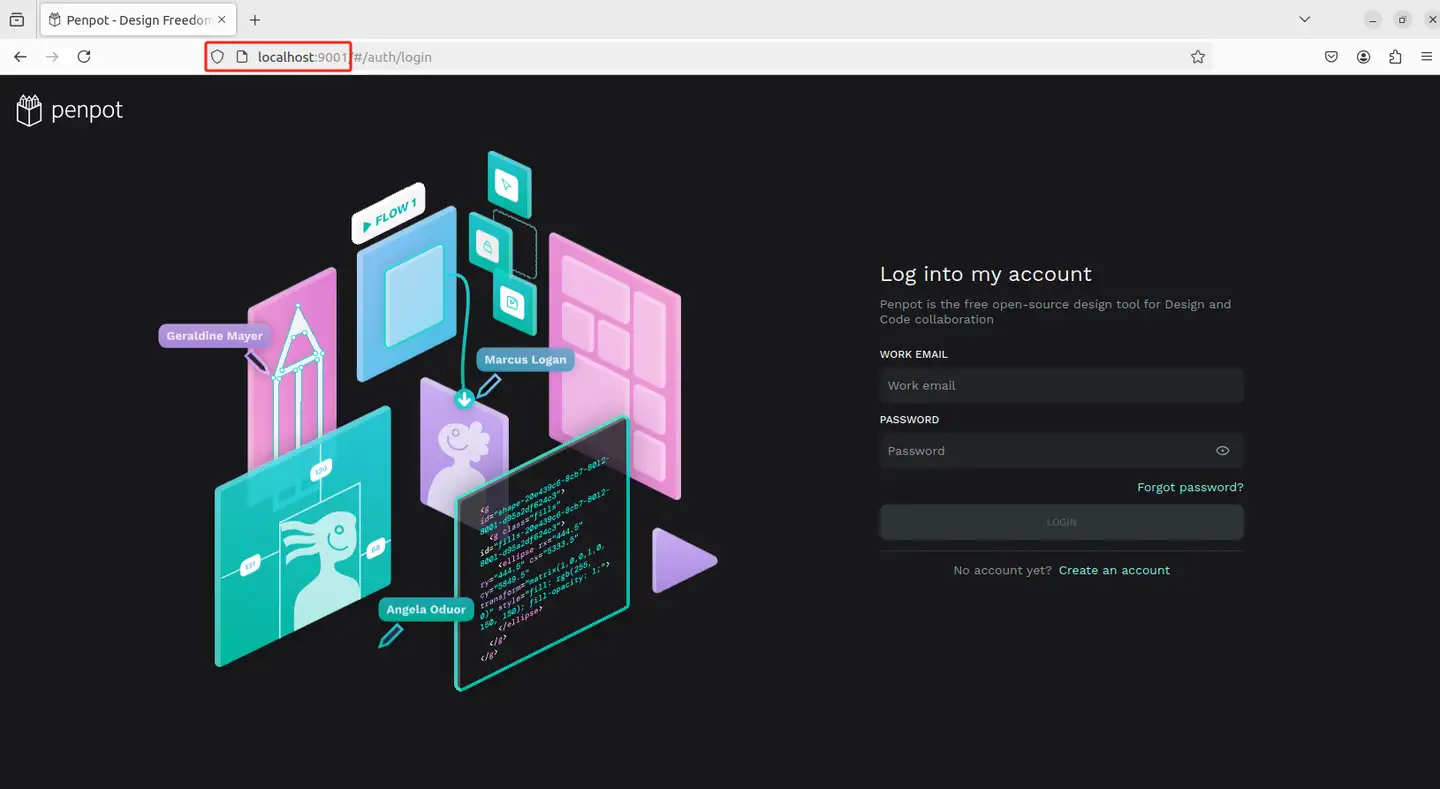
接下来我们就可以通过任意浏览器进行访问测试,打开一个浏览器输入localhost:9001,可以看到进入到了Penpot的登录界面,注册一个用户名和密码。
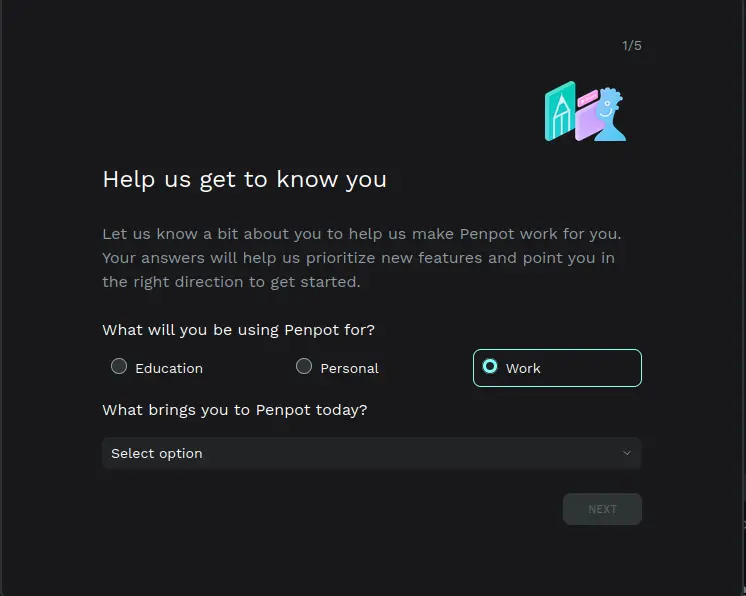
选择使用用途
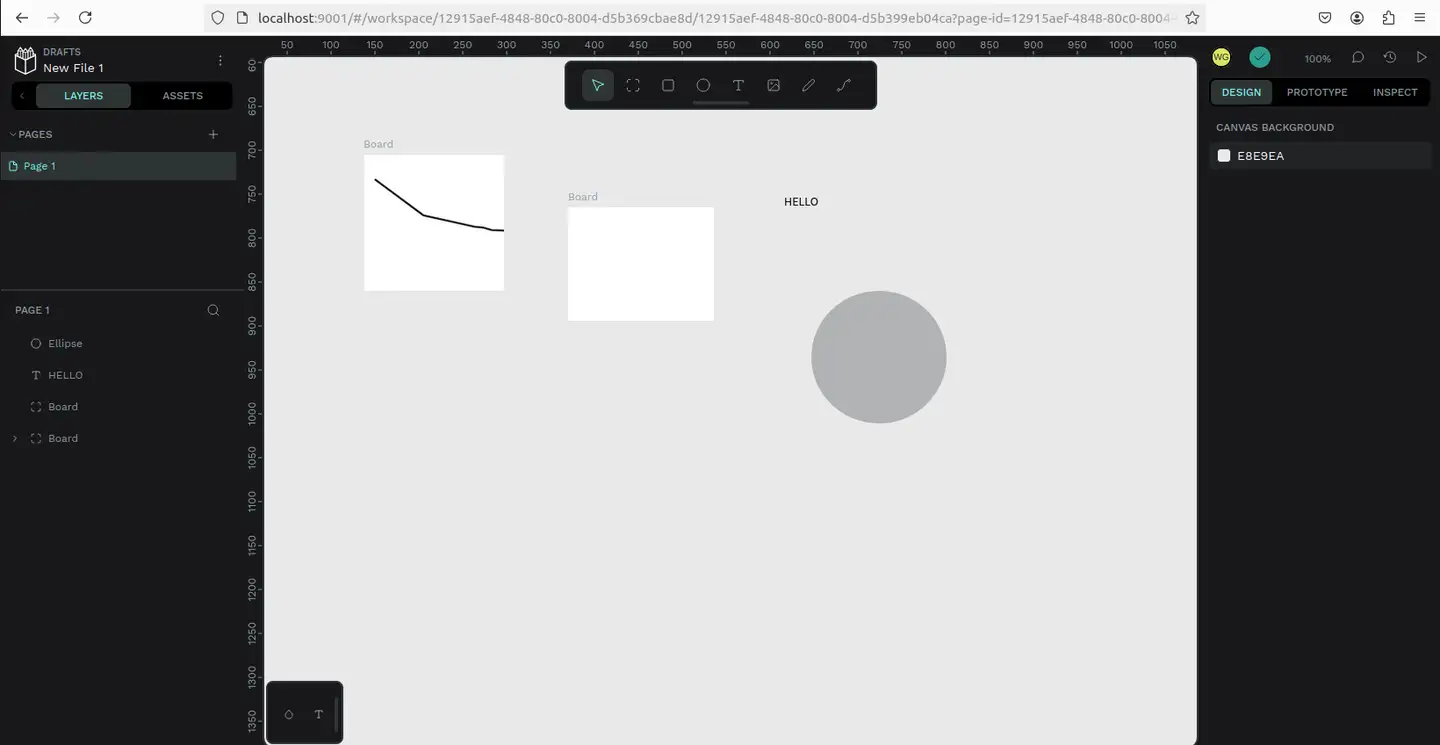
然后进入到设计界面,可以自由创作了!
画板跟同类设计软件的画布功能差不多,并具有固定的边缘。你可以根据你的需要,选择一个特定的屏幕或打印用的尺寸。
- 创建画板:点击工具栏中 “移动” 箭头正下方的第一个方形图标。点击并拖动箭头来创建一个自定义尺寸的画板。你也可以在 “设计属性” 边栏选择包揽设备最常用分辨率和标准打印尺寸的预设模板。
- 选择和移动画板:点击画板的名称或没有图层的区域。当边框变成绿色时,代表着你选择成功了。一旦选择了,按住 “Shift” 键,然后点击并拖动画板来移动它。
- 设置画板为缩略图:选择一个画板并点击右键。在菜单上,选择 “设置为缩略图”。选定的画板将作为文件缩略图显示在仪表板的卡片上。
目前我们在本机部署了 Penpot ,如果想团队协作多人使用,或者在异地其他设备使用的话就需要结合内网穿透实现公网访问。
本文转自B乎:阅读原文


